Nandan Nair

King Cobra – A Research Report

Dear Readers,

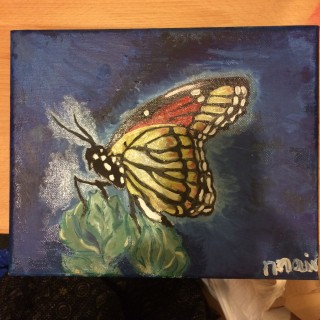
Since I recently finished  a painting of a  Cobra, and I have grown an  interest in snakes ,I have decided to write a report on all my research on Cobra’s as it is related to my painting and it is informative. I hope you enjoy.

Sincerely,
Nandan

All About King Cobras
King Cobras can grow to be up to 18 feet, making it the longest of all venomous snakes.
Cobras typically live up to 20 years old or more in the wild.
Cobras eat birds, fish, frogs, toads, lizards, eggs and chicks raised from poultry houses, small mammals, such as rabbits and rats, and even other snakes! Whoa! Talk about a big appetite! Cobras are at the top of the food chain. Their only predators are mongooses and people. Cobras weigh up to 15-20 pounds. A group of cobras is called a “quiver.

Cobras are respected in India and Southeast Asia. The Hindus consider them manifestations of the Indian god Shiva, the god of destruction and rebirth. The Buddhists believe a massive king cobra spread its hood over the Buddha while he meditated. Cobra images guard the entrances of many Buddhist and Hindu temples. So on the annual lunar holiday of Nag Panchami, Indians avoid plowing  and field work in respect of cobras.  I have also made a comparison grid:

Name Length Weight Food Chain Speed
King cobra 18 ft 15-20 lbs Birds, chicks etc. 10 mph
Black Mamba 14 ft 3.5 lbs Squirrels, birds, etc. 12 mph
Rattlesnake 5-6 ft 10 lbs Mice, rabbits, etc. 8.12 feet per second
Russel’s Viper 5-6 ft  differs Scorpions, squirrels, etc.    Unknown

Snake Comparisons
I hope you enjoyed reading my report and have a nice day. All the information was from the following websites:
0

My First Day At Point-Webster as a 5th Grader

Last Wednesday was a special day for me. The reason was because it was my first day at school. But not just any typical first day at school, it was my first day at Point Webster Middle School! So, instead of walking to and from school, I had to go by car. At school, There weren’t any lines for each grade and/or teacher, so I just stayed with my friends. When school started, the principal and the vice principal  greeted us and told all the 5th graders to go downstairs to the auditorium. There, they showed video on how to open our lockers (Since we were having trouble opening them). Then they told us who our new teachers were. Once we took out our binders and put our things in our lockers, we got to our classroom. There, we copied a schedule that  told us when and where we would go to each class/ specialist (Since each subject has one separate teacher).  After our third class, Reading, we had lunch. Then, we had Math and after that – Science. Then we had Social Studies. Finally, during the last 30 minutes of school, we had a class called Student Supports, where the teachers help us with things that we are struggling with, like opening lockers. Finally, the bell rang, and we walked outside. Once again, the principal and the vice principal showed us how to get to the front door. Outside, we waited to get picked up. It was an amazing first day at school!

0

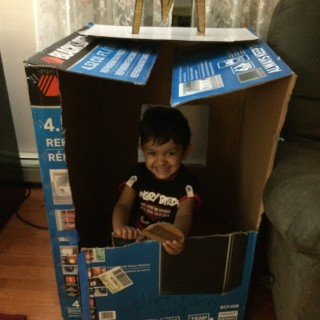
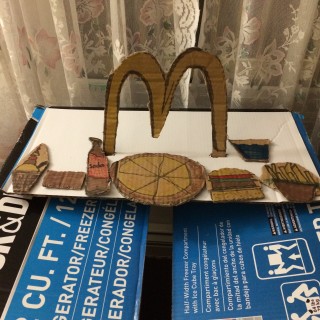
Project McDonalds – Nandan’s Model

A McDonald’s made out of a refrigerator box… Enjoy!!!

0

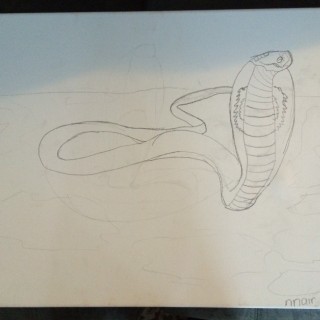
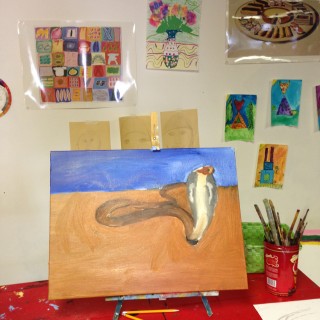
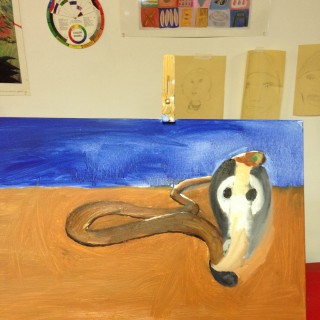
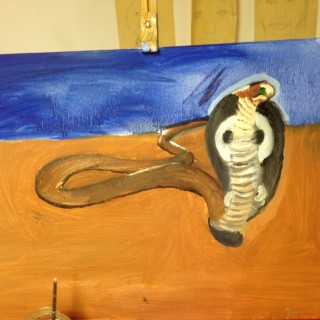
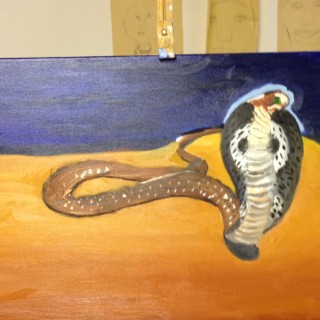
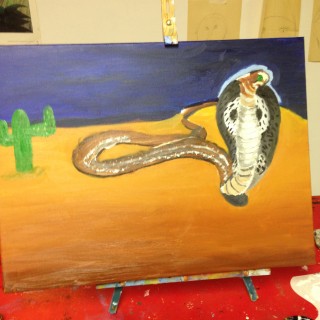
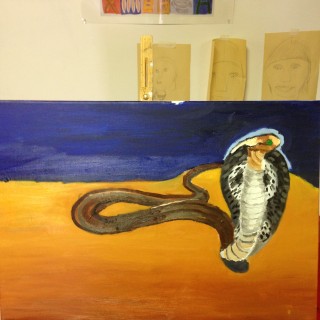
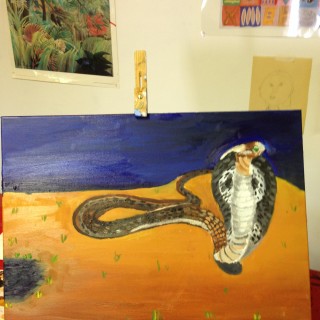
The Majestic Cobra

The Majestic Cobra is my first reptile painting. I am fascinated by Cobra’s and King Cobra’s because of their hood and unique abilities. Naturally, I wanted to paint a Cobra. In this painting, I learnt some new techniques to handle this massive snake – on the canvas.

The most challenging thing for me was the scales on the back of the body and the details on the hood. Since body is very thin, I had to make very small lines to represent the scales and make them turn along with the different shapes and colored scales. Along with that, I had to not only change the scales, but also had to change the body. This was because the color would quickly blend and not be visible. So I had to change the body color and handle the light scales on the dark part of the body.

The different color changes on the hood and belly using yellow, white, brown, and grey were also very tricky, but I could handle it. My teacher Ms. Sharon Pierce told me what I had to do for various parts of the painting. I searched for different pictures and facts about King Cobra and researched a lot information about them on the internet.

I hope that you enjoy reading this blog and seeing the pictures on my painting on Flickr.

0
  • Finally....

    Finally....

  • Complete

    Complete

  • Still Shaping Up

    Still Shaping Up

  • Trying Smoke

    Trying Smoke

  • My Face Was Full of Colors...

    My Face Was Full of Colors...

  • Almost there...

    Almost there...

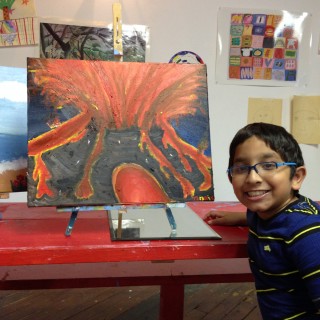
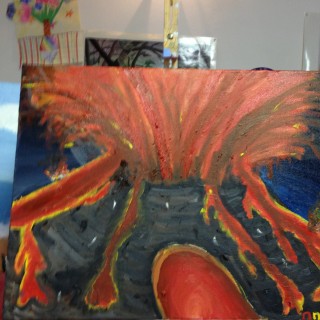
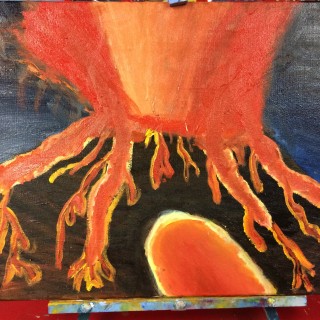
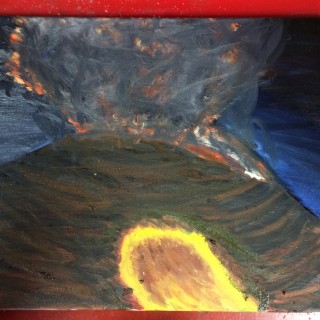
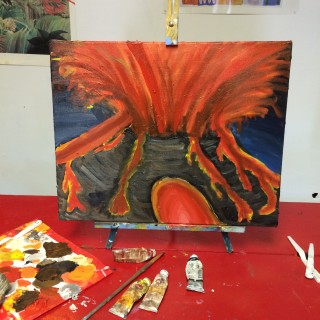
Volcano In Action… Destruction In Progress

This was my second painting on natural disasters. It was also a very challenging painting because I had to add shading to lava as well as the mountains. In this painting I learned some new techniques that I would like to discuss.

For example – In the mountain, I used different shades of white, brown, black and grey. I made every stroke as an inverted arch to give the 3D feel on the mountain. For the lava, I started off at the beginning of each lava flow, stroked the brush up to show the flow and at the same time blended it with the colors in that direction. So in the picture, the color blends from dark to bright as you move upwards. To give texture on the mountains, my teacher taught me another new technique – if the color is dark, then use a small and thin light color stroke. In this painting, you will see some white spots on the mountain. To show burning objects, I showed a burning animal and tree. To show the burning effect, I showed the object that was burning clearly. Then, I made red, yellow and orange strokes around it randomly to show that it was burning everywhere. On some places, I showed smoke as well to show burning.

Please write your comments below and let me know what you think.

0

Cracker Pizza – Double Deluxe

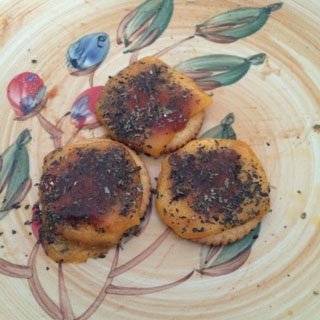
Last time, I wrote about my special dish – How to Make Cracker Pizza. Now, with a few odd but different ingredients, I have managed to create “Cracker Pizza – Double Deluxe”. In case you want to try and make them, here is the recipe:

Ingredients:
Pizza Sauce/Tomato ketchup (Depending on base) – enough to spread on cracker
Small/Medium/Large Circular crackers – 1 whole
Bread – 2 slices of any flat bread (New)
Cheese – Any cheese, 1 square slice to make 2 layers of thin slices on cracker and bread (New)

Seasoning (basil leaves, ground pepper, salt, garlic powder) sprinkle to taste.

Steps:
For Cracker Pizza

  • Spread the sauce on the cracker.
  • Using mold, cut the cheese into thin slices matching the cracker shape.
  • Put the cheese slice on top of the cracker with sauce.
  • Microwave upto 10 seconds or until cheese melts.
  • Top in with seasonings.

For Double Deluxe

  • Take 1 slice of bread, remove the crust.
  • Sprinkle little garlic powder, pepper powder and spread on bread.
  • Put cracker pizza on top of the side of bread that has seasonings.
  • Fold the remaining part of the bread on top of the cracker pizza.
  • Take the other slice of bread and once again remove the crust.
  • This time, sprinkle little basil leaves and spread it on the bread.
  • Cover the bread and cracker pizza with this slice having basil leaves and press the bread to secure and cover the edges.
  • Take little sauce and spread across the top of the bread.
  • Mold the cheese to put it on top of the bread with cracker pizza and sauce
  • Put it in microwave oven or regular oven until cheese melts to get soft or crusty “Cracker Pizza – Double Deluxe”.
  • Serve it hot with any side and healthy drink.

Please do try it and leave me your comments about it on how it tastes.

0

My 10th Birthday – Impossible to Top…

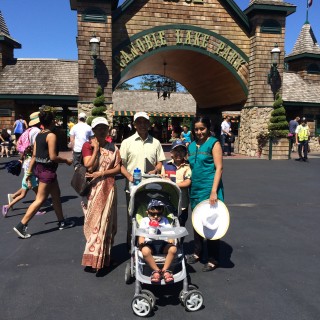
 Yesterday was a very special day for me because not only was it my birthday, but I also turned 10! This year, we went to Canobie Lake Park. When we got there, we had to wait for 20 minutes because it only opened at 11:00 and the time was 10:40. after it opened, we tried […]

0

Memories – 4th Grade at Marshall School 2013-14

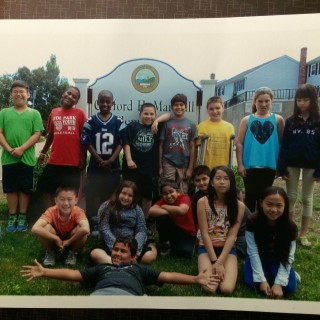
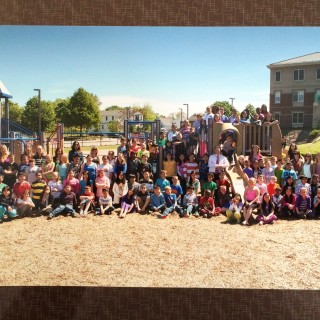
Right now, I look back a week ago when I finished 4th grade. It was until now my greatest year at school. I remember my friends, my teachers, the staff and everyone who helped me come this way. I cant believe that I am finally graduating from the Marshall School and going to middle school at Point Webster and Central Middle School. It was a very emotional day last Monday to tell everyone that we were not going to be coming back to this school as regular students, but we would be coming back as old students from Marshall school. I would like to thank my 4th grade teacher, Ms. E, and all my class friends for all the nice memories in the class.

During this year, we had some interesting field trips to:
Tis The Season… Symphony & Song
– Opera in Boston
Boston Duck Tours
– Quincy Historical Bus Drive
Central Middle School Introduction
Thomas Crane Public Library in Quincy
– Fly Up Day at Point Webster Middle School

I would also like to thank Dr. Cuff, Mr. Mike, Ms. Marianne and  Ms. Linda. I would also like to thank our Principal, Mr. Ahearn, the Asst. Principal Ms. Patch and other school friends and teachers for some unforgettable memories.

I would like to share some interesting achievements that I recollect from this amazing 4th grade year and from previous years:

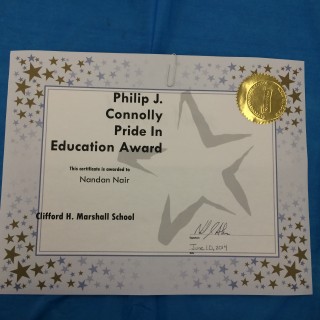
  • Received Phillip J. Connolly Pride In Education Award
  • Had my name in Clifford Marshall School Roll of Honor
  • Got into Central Middle School for Advanced Program
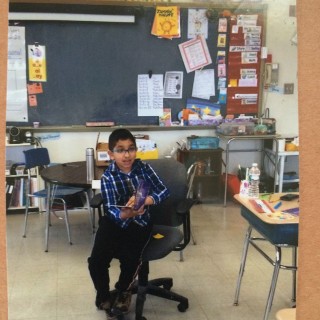
  • Taught class of students to motivate them to enjoy Science
  • I Played Clarinet for the Band and performed for Parents and Students
  • Our class won Gold Medal in 4th grade hockey tournament

It was a wonderful year and I look forward to wishing all of you a wonderful summer and wish good luck to all the upcoming fourth graders. I have created a 4th Grade Memories Album at Flickr which you can visit and see how much fun it was.

0

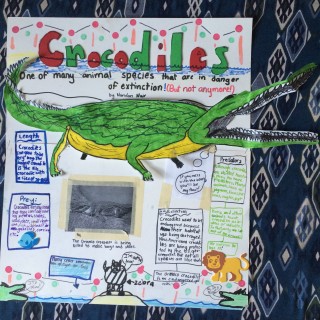
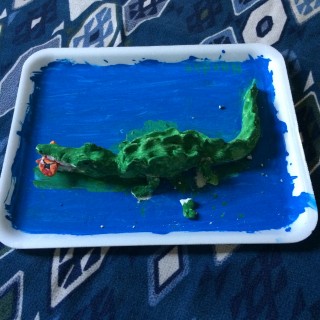
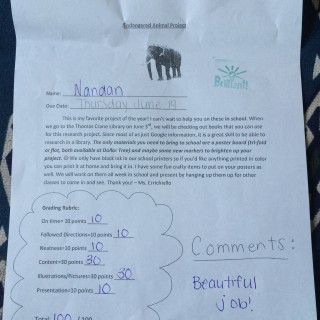
My Project Report on Crocodiles

This was my project report on Crocodiles that I made in my 4th grade. Hope you all enjoy reading it.

0
  • With My Friend Andrew

    With My Friend Andrew

  • With My Teacher Ms. Errichiello and Andrew

    With My Teacher Ms. Errichiello and Andrew

  • With Dr, Cuff and Andrew

    With Dr, Cuff and Andrew

  • Unveiling my name on the board

    Unveiling my name on the board

  • "Phillip J Connolly - Pride In Education" Certificate

  • "Phillip J Connolly - Pride In Education" - Wall of Honor

  • With Pincipal Mr. Nicholas Ahearn

    With Pincipal Mr. Nicholas Ahearn

Graduating 4th Grade from Clifford Marshall School with “Phillip J Connolly – Pride In Education” Award

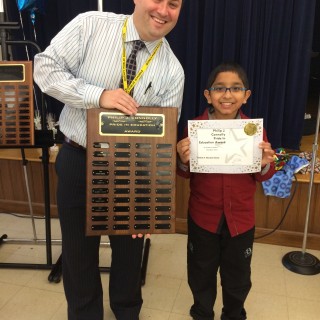
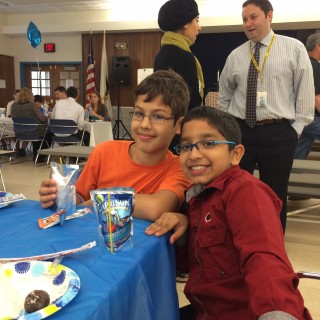
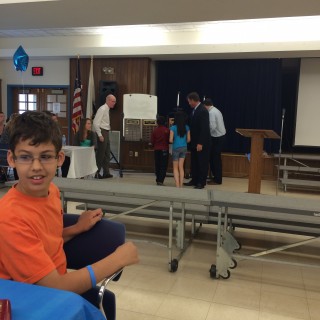
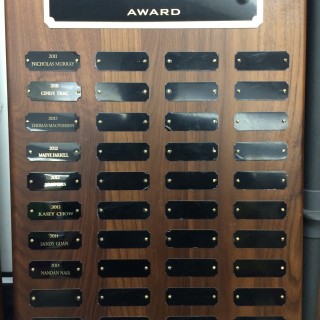
Last week, during the Annual 4th Grade Breakfast Ceremony at my school (Clifford Marshall School, Quincy, MA), I was given the “Phillip J. Connolly – Pride In Education” Award. My name was written in Golden Letters with the graduating year on a board along with the students who received it in the previous years even from the 1990’s! Very few students are given this award for excellence in education and I feel very proud to be one of them.

I have to thank our Principal Nicholas Ahearn, my class teacher Ms. Errichiello, all my teachers, my friends and the school staff for their help and support through the years at the Marshall School. I would like to deeply thank my family for the help, guidance and support.

My experience at the Marshall school was amazing. I will always cherish this school throughout my life. Now that I am going to Point Webster School and Central Middle School for my 5th grade, I am definitely going to miss the great days at the Marshall school. You can see the photos on my Flickr Page.

0

My visit to Central Middle School

About 2-3 months ago, I took a long test called SAGES-2. I passed both of them and was accepted into a newly rebuilt Central Middle School. I was very surprised and proud when I got the letter saying that I was accepted into Central for the ELC. Today, I went to the orientation program and got a tour of Central Middle School and met the staff members, our next teacher Ms. June Joyce and some students who where currently in 5th grade. First, we heard a speech from every kid and staff member in the auditorium. Second, we glanced at the students projects in the cafeteria. Finally, we saw the rooms we would be in. I even recognized some people, including my friends Adam, Sarah, Alex, Samarth and Ajay. I also met Ms. Erin Perkins, the curriculum coordinator, who had come to my classroom earlier in the day to check on Ms E’s Surface tablet recognized me! It was a great day. I look forward to going to Central Middle School and doing well there.

0

My First Participation In An Art Festival at North River Arts Society

The North River Art Society‘s Festival of the Arts – 2014 was the first art festival that I ever participated in. Before the day of the festival, I sent “The Impressionistic Pear” and “Forest – Impressionism” for display. It was a great moment for me. My name was displayed in the Society’s Art Festival brochure. […]

0
  • E5

    E5

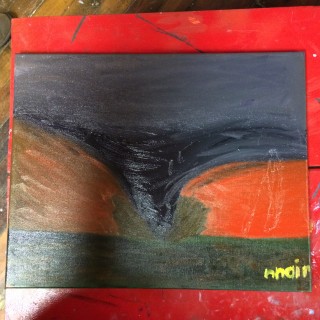
E5 MADNESS- My First Natural Disaster Painting

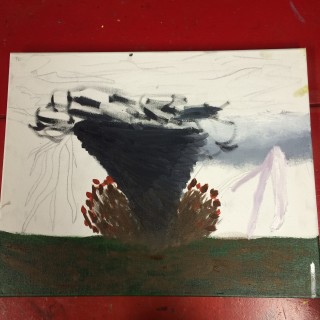
“E5 Madness” was the first painting that I did with Ms. Sharon. It is also the first painting that I have made on a natural disaster. In this painting, I made the decisions on what and how to paint. In case you are wondering, E5 is the most destructive tornado level. The other levels are E4, E3, E2 and E1. This painting shows a tornado, but not just any tornado, an E-5 Tornado! As it runs mercilessly on the ground, it causes dirt to rise from the ground and spread in different directions.  It makes the ground and sky go from happy 🙂 to FURIOUS >>:-<< You could also say it is Mother Nature’s evil side!

Here is how I made this furious painting:
1. First of all I sketched the tornado and 3 lightning bolts around it.
2. Second, I painted the grass. I remembered that I needed to make it look dark and evil, so I added some black to the green to make it look evil.
3. Third, I painted the tornado. I made it dark and destructive to strike fear at the people who look at it, and at the same time provided the light and dark shading.
4. Finally, I painted the cloud, details, removed the lightning bolts and the most obvious part of every painting – painted my signature in yellow. I took the decision to take out the lightning bolts because I wanted to have the focus of the painting on the tornado and not on lightning.

I hope you enjoy this painting as much as I enjoyed making it. You can see the pictures on the Flickr and videos on YouTube.

0
  • Put the sauce

    Put the sauce

  • Cheese

    Cheese

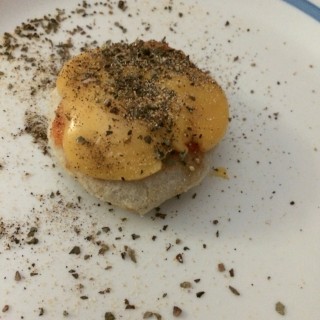
  • Final Cracker Pizza

    Final Cracker Pizza

How to make Cracker Pizza’s

Just a few weeks ago, I learned how to make Cracker Pizza’s. They are like regular pizza’s, just smaller. They are also easy to make. In case you want to try and make them, here is the recipe:

Ingredients:

Pizza Sauce/Tomato ketchup (Depending on base) – 1 Spoon
Small/Medium/Large Circular crackers – 1 whole
Cheese – Any cheese, 1 square slice
Seasoning (basil leaves, ground pepper, salt, garlic powder) sprinkle to taste.

Steps:

  1. Spread the sauce on the cracker.
  2. Cut the cheese into thin pieces.
  3. Using a molder, mold the cheese into small circles
  4. Put the cheese slice on top of the cracker with sauce.
  5. Microwave upto 30 seconds or until cheese melts.
  6. Top in with seasonings.
  7. Serve.

Please do try it and leave me your comments about it on how it tastes.

0

The Proto-Lego-Electric-Alien-Fighter-6 (PLEAF6)

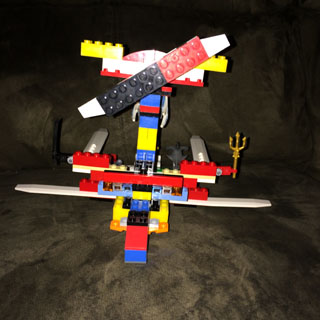
The PLEAF6 (Proto-Lego-Electric-Alien-Fighter-6) is the first spaceship I have ever built using Legos. If in case you are wondering the 6 in the name, it stands for both Level 6 Space Ship and the 6th time that I had to redesign it to make it sturdy and strong. When I made it the first time, I put very few things on it and made a regular Level 1 spaceship. But my younger brother, Nikhil, could very easily break it. The second time I built it, I rearranged a few parts and upgraded the others to make it a Level 2 spaceship. But after a while I accidentally hit it with my hand and it broke again. Like this, it continued on an on until the 6th attempt when I could get the sturdy spaceship.

This arrangement made the spaceship very sturdy. I also added 3 turbo boosts which can also be used as attack rays. I also put 3 weapons on the side – the Triton and sword were on the two ends of the two multi-attack rays, and the Shuriken was in front of the mini figure or person that was driving the spaceship. But the thing which I adore the most is A DRAGON CANNON!!!

Just yesterday, I added some new parts and rearranged other pieces and with this upgrade made it into The PLEAF ULTRA!!!! But just for fun, I even added 2 license plates.

But there’s one thing about making these types of things:” Where this a person with weapons, there’s always a villain”. So, to make that true, I added a villain. I used the head, hat and body of a Lego skeleton guy and made my own legs and arms. So, I transformed it into kind of a half man half robot guy, or a mobot.

Now, even though it’s now the PLEAF ULTRA, doesn’t mean it won’t ever evolve again. Maybe sooner or later it’ll evolve again to an even better form. But you can’t go ahead of time!

0

Photos of my Art Show on Flickr

Hello everyone,

Please visit Flickr and have a look the photos of my first art show on 15th March. It was a great experience.

I thank all of you who came to the show.

Thank you,
Nandan

0
  • Ms Sandra, Me and The Solar System

    Ms Sandra, Me and The Solar System

The Solar System

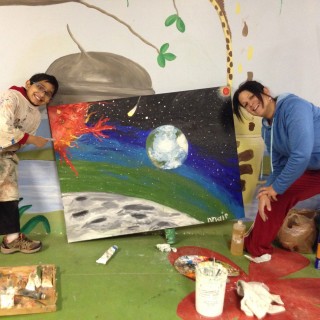
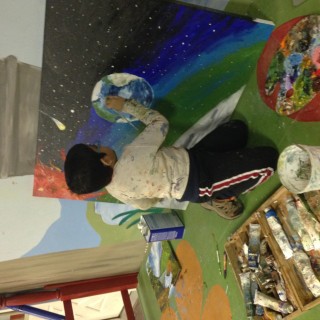
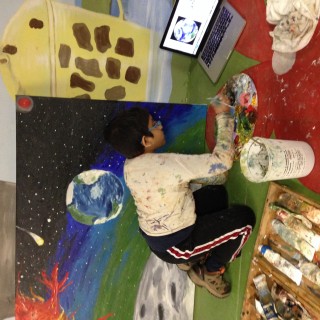
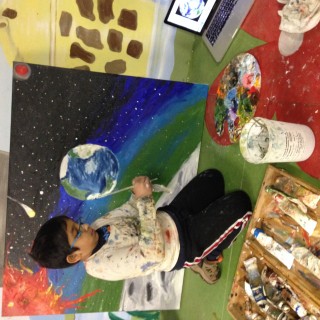
This painting, among all my paintings, was my favorite one. The funny thing about this was the fact that even though it was about the biggest canvas in Michaels, I was bigger than it! I choose to do this painting because I thought the planets were cool. The Solar System objects that I choose were The Sun, The Moon, Earth and Mars. There are three reasons why I choose these. The first reason is because I wanted to do it in the order of planets (Even though I skipped Mercury and Venus). The second reason is because of the way I want to paint this, these planets worked the best. The third reason is because since each of those planets have different shades, it goes together and a makes a combination of colors that all work out together. Along the way, I learned how to make flames on The Sun look hotter and how to make the planets glow. These are the steps to how I made it:

  1. I sketched the planets
  2. I painted the sky green where it was light, and as it got darker, I added light blue, dark blue and black.
  3. I painted the Moon with shades of white, black and gray, The Sun with shades of red, orange and yellow, Earth with shades of blue, green, white and brown and Mars with shades of red.
  4. I added stars and constellations (I have also put the first letter in my father’s name, mother’s name, brother’s name and my name as a constellation!) and painting a small dot of white with the opposite side of the brush and added craters to The Moon.
  5. I painted flames and solar flares to make it show the Sun’s heat and give the feel of the fire. Can you spot 1 more constellation in the painting? Tell me it’s name and where it is.
  6. I improved the Earth by painting the sky and water more clearly, adding the glow to Mars, painting the sides and painting my signature

Special thanks to Google Earth for the aerial view of the earth. I hope you liked this painting as much as I enjoyed painting it.

0
  • Ms Sandra, Me and The Solar System

    Ms Sandra, Me and The Solar System

Thank you Ms. Sandra!!! I will miss you.

Before the art show, I would like to thank the one who got me here, Ms. Sandra. Thank you for all the great moments you’ve given me. There are so many memories I’ve had, I’ve made a timeline of those memories:

March 2012 Art Show: This was the first art show I was in. I remember that in the cubbie room,most of our models, like my Man on the Moon, were there.

March 2013 Egyptian Art Show: This art show was phenomenal. We had a scavenger hunt and went through pyramids, and we hid our mummified selves in one room, turned off the lights, and used flashlights to find them like scientists looking for mummies!The best part was that the mayor of Quincy, Mr. Thomas P. Koch, visited us!

March 2014 Field Trip: We went to the park. I also remember that we roasted marshmallows!

February Vacation 2013 Field Trip: We went to KoKo Keys resort and swimming pool. I also remember we rode down a giant water slide!

February Vacation 2014 Field Trip: We went to Atlantis Swimming Pool and Workout Area. I also remember that I learned how to swim there!

  • How can I forget the paintings we did in my art lessons with you?
  • Lighthouse in the Grasslands (Jan 2013): This was the first painting that you helped me complete. I also remembered that you told me about the style of impressionism.
  • My Self Portrait (Feb 2013): This time I looked at a of picture me in thermal mode and painted the canvas.
  • Evening Glaciers (Mar 2013): This was the first time I used the palette knife.
  • Forest (Apr 2013): This was the first time that I made painting with trees. The palette knife really made the shadings look superior.
  • The Grand Tree (Jun 2013): This was one of the most challenging paintings that I have done. I also remember that for the the first time I painted on a big canvas (Bigger than me).
  • Impressionistic Pear (Nov 2013): I missed you when you were not here while doing this painting. Thank you for coming back. I remember that this was the first time I painted a fruit.
  • Forest – Impressionism (Jan 2014): This painting was my return to impressionism style. I remember that this painting was the first painting in which I made an animal and which is easy to see.
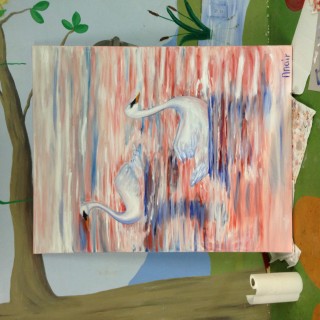
  • Swans (Feb 2014): This painting was the second painting which I did on a very big canvas (It was bigger than the Grand Tree). I also remember that for the first time I mad things moving in the water.
  • Solar System (Mar 2014): This was my latest painting and the one which I always wanted to do. It is my favorite one (For now).

Thank you for helping with the paintings and giving me the knowledge that I will never forget. These are some of the beautiful memories that you have given me. Thank you Ms. Sandra. I will miss you a lot! Please stay in touch with me.

0
  • Swans - With My Art Teacher and Swans

    Swans - With My Art Teacher and Swans

  • Swans - Just Completed

    Swans - Just Completed

  • The Swans - Final Picture

    The Swans - Final Picture

The Swans

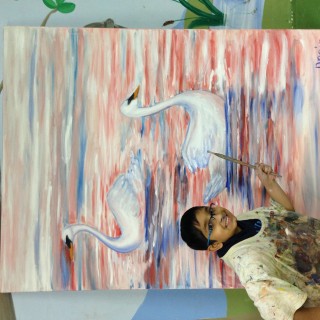
“The Swans” is my second painting that I have done on a giant canvas. It is a 5 ft by 4 ft and it is also bigger than my Grand Tree. It is much bigger than I am. While working on this painting, I put everything that I recently learned all together – Values, Color Mixing, Complementary Colors, etc. For example, using Values, I created different shades of colors on the swan. I made a pink color by mixing red and white colors. Besides, I only used the following colors – White, Red, Orange, Black and Blue. As usual, I started with sketching. While painting the lake, I put shades of Pink, White, Red and Blue since it was morning. I made use of values to do the shading. Then I painted the Swans. To paint the swans, I used the simple rule for shading that my teacher taught me – any part of an object that faces inward or bends inward is dark and the part that sticks out is bright. From inward to outward, it had to become more bright. I worked on the shading, water ridges, filling up the blank spots on the canvas, putting color patters around the face of the swan, painting the sides, top and bottom, and finally – my signature big and blue. It very tiring, but it was worth the effort. You can watch a few videos on how I did this painting on YouTube at this link. The photos are available on Flickr.

Now, that “The Swans” is over, I finally get to start painting something that I always wanted to do – The Solar System! It will be ready soon…

0

My First Art Show @The Sippy Cup Place on 15th March, 2014 at 2:00PM

The Sippy Cup Place is going to have its annual art show on the 15th March, 2014 at 2:00PM. During the last 3 annual art shows, I have enjoyed to put up exhibits with all other kids. However, this time it will be special for me as I will be putting up all my personal exhibits during the show. This will be my first Art Show. I am so excited. Please come to see all my work that I have done so far as well as the exhibits that other kids are putting up.

Date and Time: 15th March, 2014; 2:00PM – 4:00PM
Venue:
The Sippy Cup Place,
111 Franklin St,
Quincy, MA-02169.

For more details do contact my art teacher Ms. Sandra Donnelly at The Sippy Cup Place at the phone number 617-415-1705.

I look forward to seeing all of you.

0